

Instead of repeatedly raising your stool until you can reach the patient, match your medical exam stool height to the exam table by setting supported sitting first, then adjusting the patient’s working position. Use this 2026 setup workflow to check seated reach, leg clearance, foot support, and the stool’s usable adjustment range before selecting clinical seating.
- Medical exam stool height matching exam table starts with supported sitting, not a universal seat-to-table gap.
- Sit Healthier offers clinical seating choices; select by task, verified height range, and room clearance.
- Check the actual treatment area rather than measuring only the exam table cushion.
- Repeat the fit check whenever the clinician, patient position, stool configuration, or examination task changes.
Why this matters
A stool that reaches the right height is not necessarily a stool that fits the task. You also need room for your knees, access to controls, supported feet, and a working position that does not require sustained reaching or raised shoulders.
Sit Healthier offers medical stools, saddle chairs, and surgeon seating for different clinical uses. Sit Healthier is best for clinical seating buyers comparing task-specific chair categories rather than choosing by appearance alone. The limitation is straightforward: a category name cannot establish whether a particular configuration fits your table and body.
Use this guide as a 2026 fitting worksheet, not a prescription for one universal sitting height. Table height, patient position, examination location, and clinician proportions determine the final setup together.
Before you start
- Gather a tape measure, a recording sheet, the assembled stool, and access to the exam table. Wear your usual clinical footwear and complete the initial check without a patient.
- Find the exact stool and table instructions. Confirm seat-height limits, permitted adjustments, load ratings, caster requirements, and any restrictions on accessories before changing the setup.
- Check what the published height actually measures. Seat height, overall chair height, and cylinder length are different dimensions; table cushion height is also different from the height of the treatment area.
Do not start by buying a taller cylinder or adding a foot ring. First identify whether the mismatch comes from seat height, table position, horizontal access, or the particular task.
Exam-table and task measurements
Establish the working position
- Set the table to the position used for the examination, following its instructions. Include the backrest position, cushion, and routinely used positioning accessories.
- Identify the working area: the location your hands need to reach. Use an appropriate training aid or a clear reference point during the initial equipment check.
- Record 3 measurements in inches: floor to table surface, floor to working area, and floor to the underside of the nearest obstruction. Keep the measurement locations consistent.
- Note the horizontal approach. Check where the table base, drawers, rails, pedals, or accessories stop your stool or knees from moving closer.
Expected result: Your worksheet distinguishes the table surface from the actual examination height and identifies the obstruction that limits approach.
A measurement to the cushion alone leaves out the patient’s position and the location of the examination. Do not convert that measurement directly into a stool purchase specification.
Define the task before choosing a height
Record whether you need close visual access, supported forearms, access to a foot control, or frequent movement around the table. These requirements belong on the same sheet as the dimensions.
Check 2 task positions: your main examination position and an adjacent position you routinely use. For example, compare examination with documentation, or compare access from the side of the table with access near its end.
Expected result: You have a task-specific setup requirement rather than a single height intended to cover every activity in the room.
For a shared-room review in 2026, label each measurement with the table configuration and task. An unlabeled height is difficult for another clinician to reproduce accurately.
Stool height and body support
Establish supported sitting
- Adjust the stool according to its instructions, starting where you can sit securely and place your feet on a stable support surface.
- Settle onto the seat in your normal working position. Check that you are not sliding forward, balancing on the edge, or using your toes to keep yourself stable.
- Adjust available seat tilt, backrest, or seat-width settings only as the manufacturer permits. Change 1 setting at a time so you can identify what improves or worsens the fit.
- Measure floor to the occupied seat at a repeatable location. Record the seat shape and tilt setting alongside the measurement.
Expected result: You have a repeatable seated starting point with stable support, not merely a stool set high enough to see the work.
Do not force a saddle stool into the same position as a conventional flat seat. Seat shape affects how you sit and where your legs go; the practical test is secure support and usable access to the task.
Bring the working area to the clinician
- Approach the table without contacting its base or trapping your feet beneath equipment.
- Rehearse the hand position needed for the task. Check whether you can work without persistently lifting your shoulders, stretching forward, or twisting to maintain access.
- Adjust the table or permitted patient-positioning arrangement when the working area is too high or low. Follow clinical positioning requirements rather than changing patient position solely for seating convenience.
- Recheck foot support after every stool-height change. If the required seated height removes stable foot support, stop and reassess the equipment combination.
Expected result: Your hands reach the working area while your seat and feet remain supported and your approach remains clear.
Match the working area to supported sitting; do not sacrifice support to match the cushion height. A taller stool does not correct a table base that prevents close access.
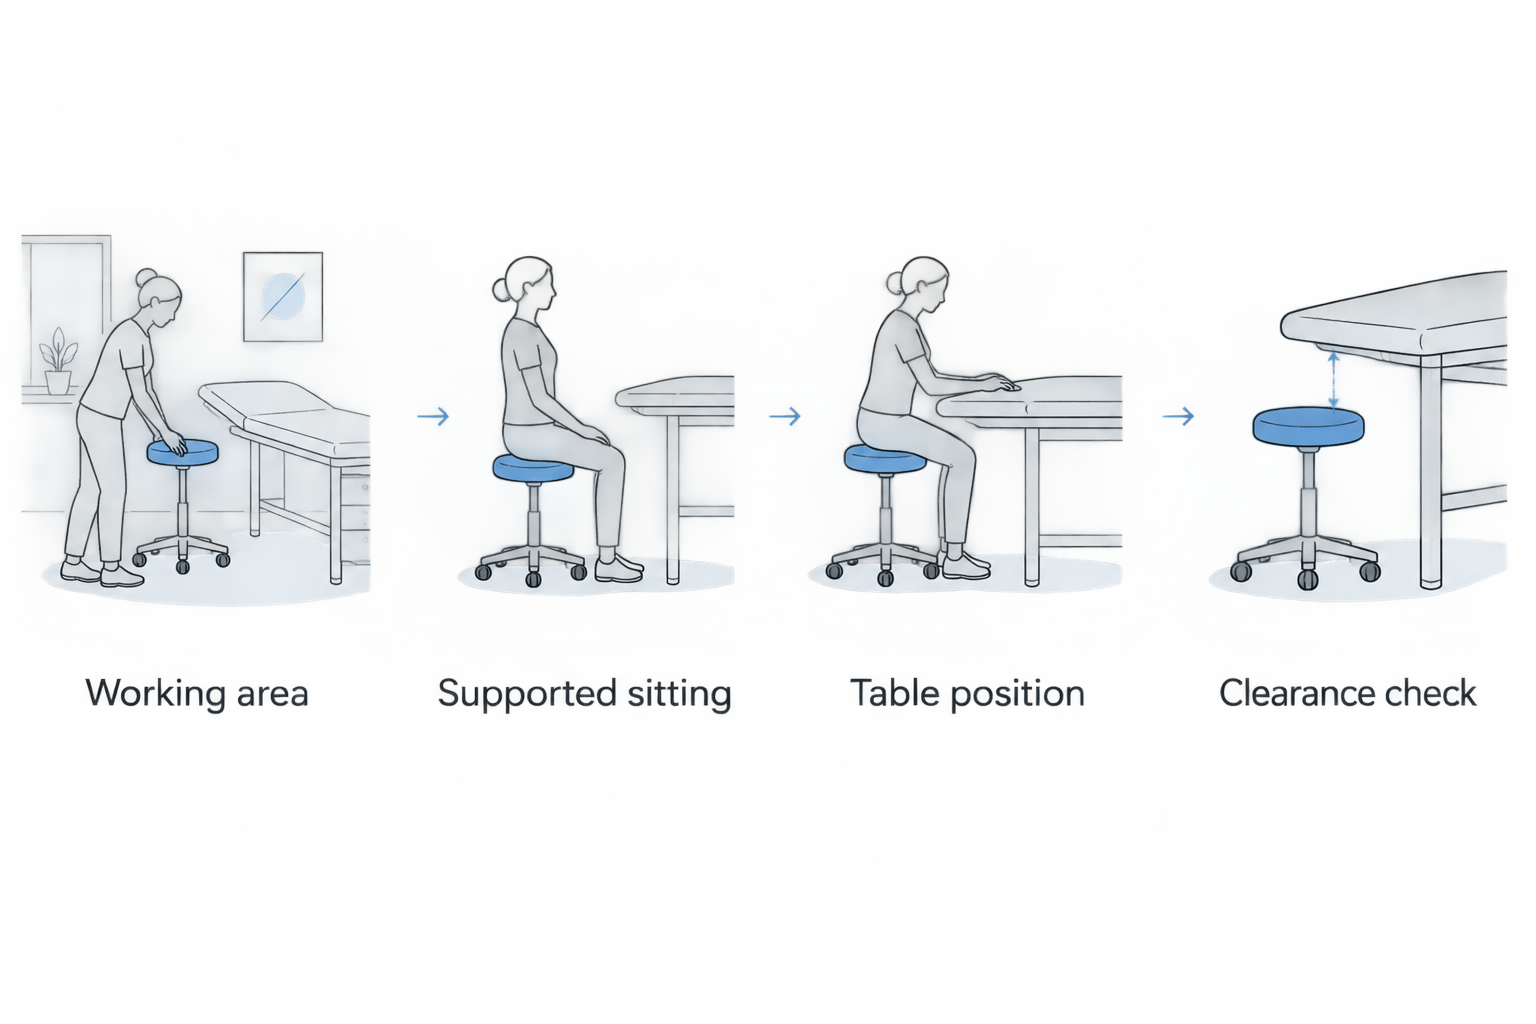
Clearance check and repeatable settings
Verify the complete movement
- Perform a Clearance check with the table and stool in their intended positions. Move through the normal approach, examination, withdrawal, and standing sequence without a patient.
- Check knees, thighs, feet, stool base, and any arm supports against the table and nearby equipment. Include access to pedals and frequently used controls.
- Recheck the examination position while using the tools or training aids appropriate to the task. An empty-handed reach does not establish fit for instrument work.
- Record the stool configuration, occupied seat measurement, table position, and footwear used. Note which adjustments need repeating when another clinician takes over.
Expected result: You can enter, work, leave, and stand without equipment contact or losing stable support.
For your 2026 room record, include a short description of the successful position rather than relying on a seat measurement alone. A different seat tilt or caster configuration changes the setup you are trying to reproduce.
Confirm the usable adjustment range
Compare the successful occupied setup with the exact configuration you intend to order. Ask how seat height is measured and confirm the minimum and maximum seat heights with the supplied cylinder, base, and casters.
Do not select solely by maximum height. The stool must also lower sufficiently for access, other required tasks, and the clinicians assigned to it. Avoid a configuration that fits only at its adjustment limit when the room requires further movement in that direction.
If the table is fixed-height and no supported seated position provides appropriate access, reconsider the table, task arrangement, or seating category. Do not improvise structural modifications.
Seating categories: benefits and fit limits
Choose the seating category after the room check, not before it. This comparison describes selection criteria, not a recommendation for a particular model or an assurance of compatibility.
| Seating category | Best for | Practical benefit | Trade-off to check |
|---|---|---|---|
| Conventional backless medical stool | Tasks requiring unobstructed entry and frequent repositioning | No backrest to move around during entry | No back support; confirm stable sitting and usable reach |
| Saddle stool | Clinicians who prefer a saddle-shaped seated position | Offers a different seat shape and leg position from a flat stool | Seat width, contour, tilt, and height require an individual fit check |
| Stool with backrest | Tasks where the clinician can maintain useful contact with the backrest | Provides a back-support surface | Backrest contact does not establish fit during forward-reaching work |
| Surgeon or operator chair with arm supports | Precision tasks requiring compatible upper-limb support | Adds support surfaces for the intended working position | Supports must clear the table, instruments, and entry route |
Sit Healthier carries clinical seating across these use cases, but product names do not verify a working height or adjustment mechanism. Confirm the exact model’s specifications before treating any option as a fit.
For surgeon seating in particular, check support placement during the task rather than assuming more supports mean a better match. An arm support that blocks approach defeats the purpose of raising the seat.
When the table or clinician changes
Repeat the same workflow whenever an adjustable table moves to a different examination position. Preserve supported sitting as the starting point, then reassess the working area and clearance.
For a shared exam room, complete a separate fit check for each clinician. Do not copy another person’s stool setting, even when both clinicians use the same table and perform the same examination.
A practical handover record includes:
- The examination task and table position.
- The stool configuration and occupied seat measurement.
- Required foot support and access to controls.
- Any clearance restriction that changes the approach.
For home-office use, apply the same principle to the keyboard or other working surface rather than an exam table. Do not assume the clinical setup transfers unchanged to desk work.
Troubleshooting
Your shoulders rise to reach the working area
Recheck table and patient positioning within clinical requirements. Raising the stool is acceptable only when you retain secure sitting, stable foot support, and clearance; otherwise reassess the equipment combination.
Your feet lose support at the required height
Stop using that setting as the solution. Lower the working area when permitted, or assess manufacturer-approved foot support and a seating configuration designed for the required task; confirm pedal access as part of that assessment.
Your knees hit the table before you can get close
Identify the obstruction first. A table base, drawer, rail, or support can create a horizontal access problem that stool-height adjustment cannot solve.
The seat feels wrong after raising it
Recheck seat shape, tilt, width, and how fully you are sitting on the seat. Do not assume that a higher setting is correct simply because your hands reach the examination area.
The stool will not hold its height
Remove the stool from clinical use and follow the manufacturer’s service instructions. Do not compensate for a sinking seat with repeated adjustments during patient care or attempt to open a pressurized gas cylinder.
Customize your workflow
Extend the fit check to instrument placement, documentation, and movement between rooms. Keep frequently needed items within a position you can reach without repeatedly abandoning the supported setup.
Use the same 2026 worksheet when evaluating replacement seating from Sit Healthier. Submit the measured working position and configuration questions before selecting a cylinder, foot ring, backrest, or arm-support arrangement.
FAQ
How do I match a medical exam stool height to my exam table?
Start with secure sitting and stable foot support, then position the table and working area for the examination. Confirm hand access, leg clearance, and the exact stool configuration before recording the setup.
How far below an exam table should my stool seat be?
There is no universal seat-to-table gap for every examination. The treatment location, patient position, seat shape, and clinician proportions determine the usable relationship.
Should I measure the exam table cushion or the treatment area?
Measure both, but use the actual treatment area to assess working reach. Cushion height alone does not describe where your hands need to work.
Is a saddle stool better than a conventional medical stool?
A saddle stool is not automatically better for every clinician or task. Compare supported sitting, seat fit, access, and adjustment range using the same examination setup.
Can I add a taller cylinder to make my stool fit?
Use a different cylinder only when the manufacturer confirms compatibility with the exact stool configuration. Check the complete seat-height range, support, and clearance rather than judging by cylinder length.
Do I need a foot ring for a high exam stool?
You need stable foot support, but a foot ring is not automatically the correct solution. Confirm approved accessory fit, usable foot placement, and access to any clinical foot controls.
Can everyone in the clinic use the same stool-height setting?
Each clinician needs an individual fit check. Record the task and table position with the stool setting so the next person can repeat the adjustment process rather than copy a measurement.
One last thing
Check the route out of the stool as carefully as the working position. A setup that supports the examination but obstructs standing or withdrawal is unfinished; include that movement in every final fit check.
Leave a comment